Home
The purpose of this repository is to contain source code that illustrates real-world use cases for RTI Connext DDS. These use case examples should be written from the perspective of a user of RTI Connext DDS, and should highlight the data model, QoS configuration, and application design when using RTI Connext DDS middleware.
The first thing you will need to do is create a new Github account.
- Go to http://www.github.com
- Pick a username and password and create your new user.
- Click on "sign up for free"
To manage your GitHub repositories we recommend you to use the GitHub application in your computer. You can download this application from:
- http://mac.github.com/ if you are using Mac (Mac OS X 10.7 and above).
- http://windows.github.com/ if you are using Windows.
- http://eclipse.github.com/ if you are developing with Eclipse.
If you are running on a different platform, you will have to use GitHub through the command line. To use GitHub through the command line, first install Git:
- Use the following instructions to install Git on Linux or Solaris
- Download Git for Mac from this website. Then install the DMG file.
Once you have installed Git, you can configure your settings. Open a terminal and:
-
Set the default name for Git to use when you commit (e.g., Fernando Garcia)
git config --global user.name "Your Name Here" -
Set your default email for Git to use when you commit. Use the email address you configure your GitHub account with.
git config --global user.email "your_email@example.com"Your email address for Git should be the same one associated with your GitHub account. If it is not, see this guide for help adding additional emails to your GitHub account. If you want to keep your email address hidden, this guide may be useful to you. [GitHub Installation Guide]
If you want to start collaborating adding or modifying examples of one of our GitHub repositories, you will need to "fork" the GitHub repository you want to collaborate on. Forking is not a native Git concept. It is the special name given by GitHub to server-side clones. This clone provides the user a place to push changes without affecting the original repository until the changes are ready to be merged.
To fork a repository, log in to GitHub and look for the repository you want to fork (e.g., rticonnextdds-examples). Once you are in the repository webpage, look for the "Fork" button (see Figure) and click on it.
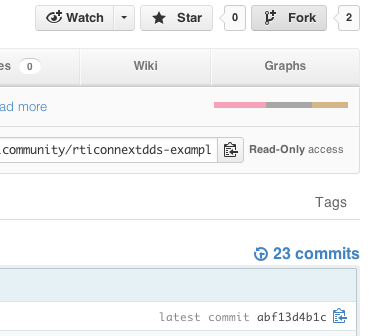
Wait a few seconds and you will see the forked repository in your account.
Once you have forked the repository (once it has been placed in your GitHub account) you will need to clone the repository in your computer to get a local copy you can work with.
Open the GitHub application and login with the user you created. You should see all the repositories you have in your account, including the one you just forked. If you are not able to see the forked repository, click on the refresh icon.
Once you can see the repository, click on the "Clone to Computer Button" and select the directory where you want to download it.

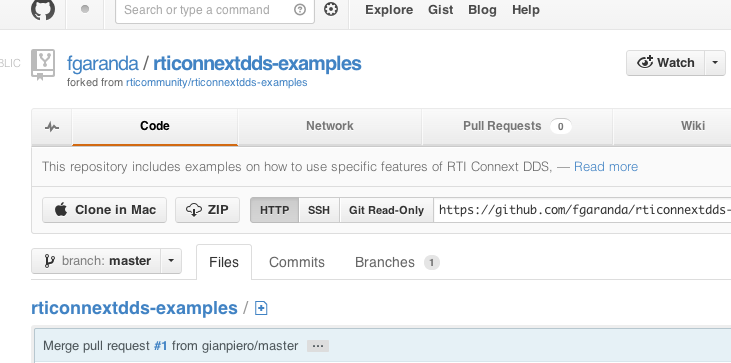
To clone the repository you just forked using the command line, go to your account on http://github.com and look for the repository you just forked. If, for instance, your account is fgaranda and the repository you forked is rticonnextdds-examples, the repository should be located in http://github.com/fgaranda/rticonnextdds-examples.
Once you are in the forked repository website, click on HTTP and copy the repository URL (see Figure). This is the URL of the Git repository located in the GitHub servers that we are going to clone.
Open a terminal and change to the directory where you want to clone the repository. For instance:
cd /home/fgarcia/github
And then clone the repository using the URL you copied.
git clone https://github.com/fgaranda/rticonnextdds-examples.git
The examples in this repository are meant to represent real-world use cases for RTI Connext DDS software. They are generally more complex than a feature example, and should highlight a data model, QoS, and application design using RTI Connext DDS.
If you would like to contribute an example that highlights a single feature of RTI Connext DDS, please see this page for more details.
The base directory is called rticonnext-usecases/ Individual use cases are in nested directories.
Use case names are written in CamelCase, such as:
- UseCaseName/
-
Doc/ -
ExampleCode/
Within the ExampleCode directory, the structure will vary depending on what type of source makes up the example. For C++ examples, the directory structure is currently modeled on RTI's examples that ship with the RTI Connext DDS product in the examples/ directory. A scripts directory may be added to contain batch files or shell scripts that can perform actions before running the executables.
For C++ source, it should be divided into:
- ExampleCode/make
- ExampleCode/scripts
- ExampleCode/src
- ExampleCode/win32
This directory structure may be updated over time.
Classes do not need to be confined to individual files as they are in Java, but should instead be grouped in files according to related functionality.
C++ file extensions should be consistent with the RTI code generator. In version 5.0.0, this means that C++ files should end in .cxx.
Indenting should be a single tab.
Line length should be 80 characters or less, unless a method name is longer than 80 characters.
Class names are in CamelCase, with the first letter capitalized and words separated by capital letters.
Example:
class FlightPlanReader { };
In alignment with real-world best practices, modules will be used in all IDL/XML type definitions.
In C++, a "using namespace" declaration can be used inside a source file.
using namespace com::rti::atc::generated;
However, using declarations should not be used in header files, so type names may become long, such as:
com::rti::atc::generated::TrackDataWriter *_trackWriter;
Method names are also in CamelCase, with the first letter capitalized and the words separated by capital letters.
Example:
bool ProcessFlightPlans( … );
Class attribute names should have an underscore prepended to them, and should start with a lower case letter after the underscore. The rest of the words in a name will be separated by capital letters.
Example:
TrackDataWriter *_trackWriter;
Method arguments should start with a lower case letter. All word names after the first word should be CamelCase.
Global constants and macros should be in all capitals, with underscores ('_') as separators.
Example:
#define SFO_LAT